

Recording guitar in a home setup usually fails before mixing even begins. The tone is noisy, inconsistent, or thin, and no amount of plugins fixes it. Most producers assume they need better gear, but the real issue is how the signal is captured and prepared.
A cheap guitar, basic interface, and stock DAW are more than enough to produce clean, professional results. The difference comes from controlling noise, gain, and performance before adding any effects. If the recording is clean, everything after becomes easier. If it is not, every plugin makes the problem worse.
This breakdown focuses on recording guitar properly inside FL Studio, then shaping it with amp simulation and basic processing. The goal is not to build a complex chain. It is to capture a clean signal, control it, and turn it into a polished, usable sound inside a full production.
Video Breakdown
The video walks through the entire process from hardware setup to final loop. It begins with essential gear, then focuses on eliminating noise before recording, followed by capturing the guitar inside FL Studio using Edison.
The key concept is that recording quality determines everything that follows. Instead of fixing noise after recording, the workflow removes it at the source. This prevents artifacts and preserves the natural tone of the guitar.
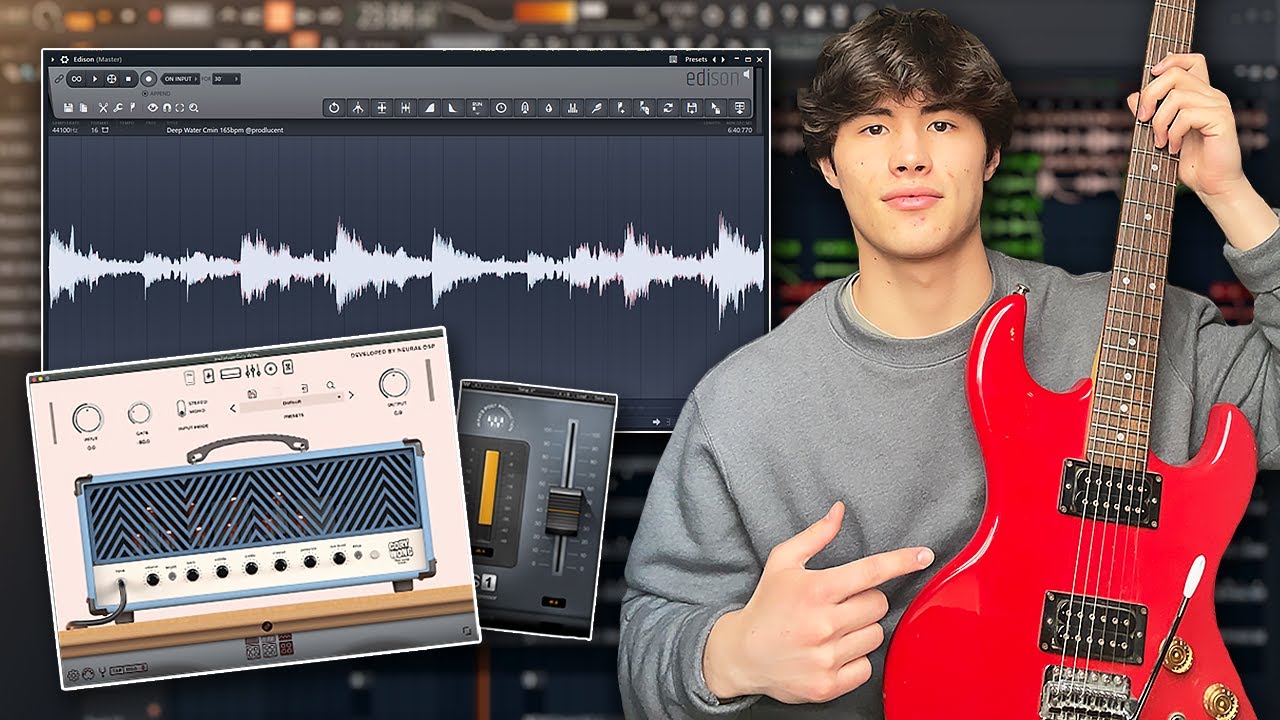
After recording, the guitar is shaped using amp simulation. The raw DI signal is clean but lacks character. The amp VST adds tone, color, and realism, turning a flat recording into something that feels like a miked guitar amp.
What It Gets Right
The core principle demonstrated is source control before processing.
The workflow prioritizes eliminating noise, stabilizing input levels, and tuning the instrument before recording. This ensures that the recorded signal is usable without heavy correction.
It also emphasizes that amp simulation is where most of the tone comes from. The recording itself should be clean and neutral, allowing the amp to shape the final sound.
Where Producers Go Wrong
The biggest mistake is recording noisy input.
Electrical buzz, hum, and interference often come from cables, interfaces, or positioning near electronic devices. Once recorded, this noise becomes part of the signal and is difficult to remove without degrading quality.
Another mistake is recording without proper gain control. If the input is too low, noise becomes more noticeable when boosted. If it is too high, clipping occurs and cannot be fixed.
Many producers also skip tuning. An out-of-tune guitar creates dissonance that cannot be corrected with EQ or effects.
Finally, some rely too heavily on amp presets. While presets are useful starting points, they rarely fit perfectly in a mix without adjustment.
Real Technique Breakdown
Signal chain quality defines recording clarity.
- Use a clean guitar cable to reduce interference
- Connect through an audio interface for proper gain control
- Avoid unnecessary adapters or extensions
This works because a clean signal path reduces noise at the source. It fails when low-quality cables introduce interference. :contentReference[oaicite:0]{index=0}
Noise reduction should happen before recording.
- Use noise reduction tools like RX or NS1 on input
- Position guitar away from electrical sources
- Monitor noise before recording begins
This works because it prevents noise from being recorded. It fails when noise is removed after recording, which can degrade tone.
Tuning ensures harmonic accuracy.
- Use a tuner plugin for precision
- Check tuning before each take
- Retune if recording multiple layers
This works because pitch accuracy affects the entire mix. It fails when tuning is ignored.
Compression during recording stabilizes dynamics.
- Apply light compression to even out volume
- Avoid aggressive settings
- Maintain natural dynamics
This works because it keeps levels consistent. It fails when over-compressed, reducing expression.
Recording with Edison captures clean audio.
- Record directly from mixer input
- Match tempo before recording loops
- Edit timing and length after recording
This works because it allows precise control. It fails when timing is inconsistent.
Amp simulation defines tone.
- Use amp VSTs to shape character
- Adjust EQ within the amp for clarity
- Remove extreme low and high frequencies
This works because the amp provides tonal identity. It fails when relying solely on presets.
Layering enhances musical context.
- Add supporting instruments like piano or bass
- Ensure guitar fits within the arrangement
- Avoid frequency clashes
This works because context defines perception. It fails when the guitar is treated in isolation.
Real-World Use
Start by setting up your signal chain. Ensure your guitar, cable, and interface are connected properly and producing a clean signal.
Check for noise before recording. If you hear hum or interference, fix it at the source instead of planning to remove it later.
Tune the guitar before recording. This step ensures the performance will sit correctly with other instruments.
Set input gain so the signal is strong but not clipping. This provides a clean recording with minimal noise.
Apply light compression if needed to stabilize dynamics. This helps maintain consistent levels during performance.
Record using Edison and capture a clean take. Focus on performance rather than perfection.
Edit the recording to fit the tempo and structure. This ensures it aligns with the track.
Apply amp simulation after recording. Shape the tone to match the style and mix.
Add supporting instruments and adjust the guitar within the arrangement. This ensures balance and clarity.
This sequence works because each step builds on a clean foundation. Skipping early steps introduces problems that cannot be fixed later.
Tools and Workflow
- Audio Interface: Focusrite Scarlett 2i2
- FL Studio for recording and arrangement
- Edison for capturing and editing audio
- Fruity Compressor for dynamic control
- RX 11 or Edison for noise reduction
- G-Tune for tuning accuracy
- Neural DSP Archetype plugins for amp simulation
- Guitar Rig 7 or AmpliTube as alternatives
The workflow proves that high-quality guitar recordings come from clean input and proper tone shaping, not expensive gear. For additional tools, see free VST plugins.
Source Video
How To Record Quality Guitar on FL Studio | Easy Step by Step Tutorial
Original tutorial by Lucent. This article expands on the workflow with deeper production analysis and real-world application.
Professional Wisdom
This workflow works because it prioritizes recording quality over post-processing.
However, professional setups often go further by using DI and reamping workflows. This allows the clean signal to be recorded once and processed through different amp settings later without re-recording.
Another advanced technique is double tracking. Recording the same part twice and panning left and right creates width and depth that cannot be replicated with effects alone.
The key takeaway is that clean recordings give you flexibility. Poor recordings limit every decision that follows.
Final Takeaway
Clean guitar recordings start with noise control.
Signal quality matters more than expensive gear.
Amp simulation defines tone, not the raw recording.
Each step should prepare the signal for the next.
Professional results come from control, not complexity.

FL Studio Free Download
Download the full version of FL Studio and start producing immediately. No time limit, no restrictions, and all core features available from day one.
Upgrade later only if you need to reopen saved projects or expand your plugin collection.
No comments:
Post a Comment